The Banner Settings dialog gives you fine control over how the Readable Banner looks and behaves. Every visual aspect of the Banner is configurable — making it possible to tune for your specific reading needs without affecting the underlying document.
Opening Banner Settings
- Click the Settings button on the Readable toolbar
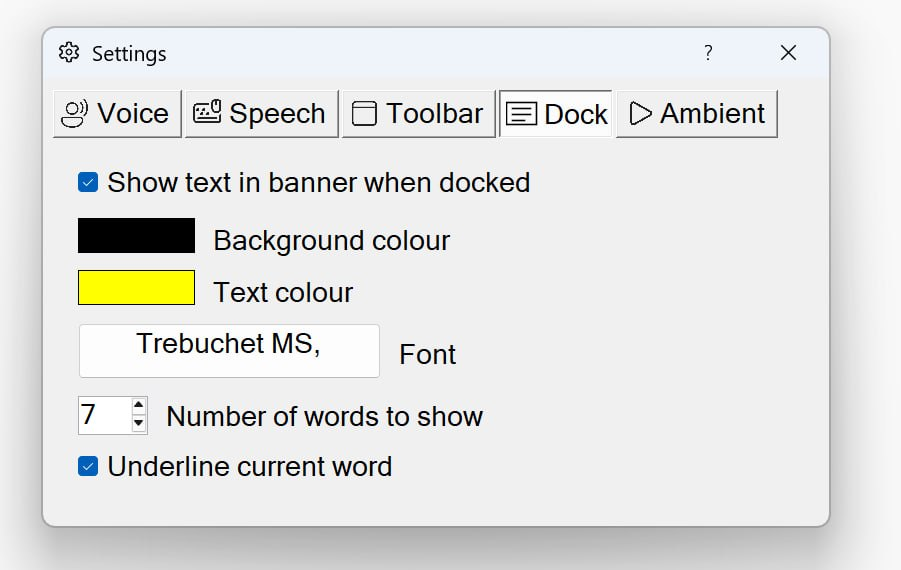
- Open the Dock tab (the Banner only appears in dock-top mode, so the controls live there)
- Adjust any of the settings below
- Close the Settings dialog — most changes take effect immediately, including while Readable is speaking
Font and size
- Font family
- Choose any font installed on your Windows system, including the 6 Sensory Fonts installed with Readable. Sans-serif fonts are easier to read at large sizes and on lower-resolution monitors.
- Font size
- From small (matching toolbar text) up to very large (filling the full Banner height). Larger sizes show fewer words at once but each word is more readable.
- Bold / italic
- Toggle for bold or italic styling.
Colours
- Text colour
- The colour of the words in the Banner. Independent from the document's text colour.
- Background colour
- The Banner's background. Pick a high-contrast pairing with the text colour, or a calmer combination for long reading sessions.
- Highlight colour
- The colour used for the currently-spoken word in the Banner. Often a different shade or a coloured background to make the current word stand out. For the word underline highlight colour (which marks the current word in the source document, not the Banner), this is set in Speech Settings and can be adjusted to match your selected Banner background colour.
Banner length
- Number of words to show
- How many words of context are visible at once. Lower values (3–5 words) give a focused, large-text view. Higher values (10+) show more sentence context but at smaller size.
The Banner scrolls in step with the voice — there is no separate Banner scroll speed. To slow down or speed up the Banner, adjust the speech rate on the Voice tab of Settings (see Voice and Speech Settings).