All Sensory Ruler for Mac settings are controlled directly from the floating toolbar. There is no separate settings window — every option is available at a click from the toolbar itself.
Toolbar controls
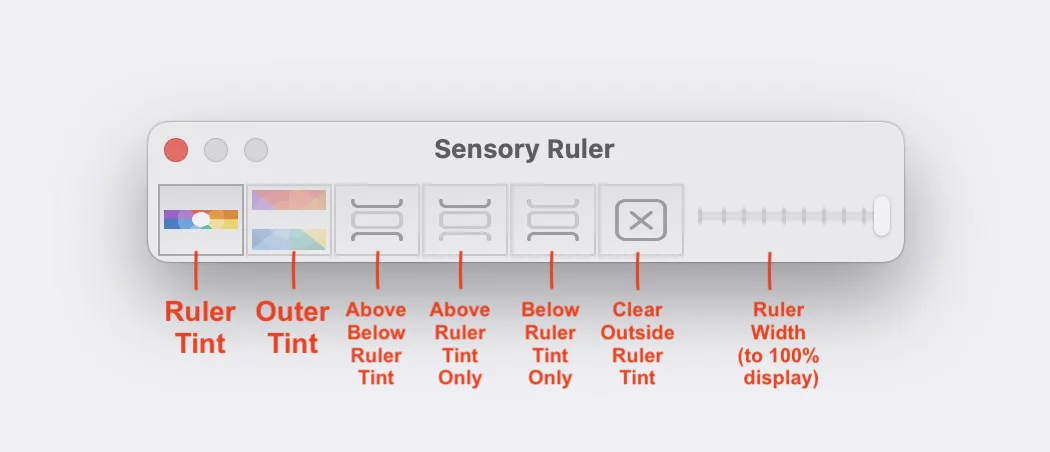
- Ruler colour icon — Click to open the colour picker for the ruler strip itself. Choose any colour and opacity level. See Set Ruler Colour & Tint.
- Background colour icon — Click to open the colour picker for the area above and below the ruler. See Tint Above & Below.
- Above/Below tint icons — Four icons to control whether the background tint appears above the ruler, below it, both, or neither. See Tint Above & Below.
- Size slider — Drag left to narrow the ruler, right to widen it. Moving fully right expands the ruler to full-screen tint mode. See Ruler Size & Full Screen Tint.
- Sensory Ruler icon — The app icon. Drag this to move the toolbar to a different position on screen.
- Close button — Closes Sensory Ruler.
Tip: The toolbar can be positioned anywhere on screen. Drag it by the Sensory Ruler icon to move it to where it is least obstructive for your workflow.